Want some ideas on how to package press on nails? Well I’ll show you what I did and give you some ideas on other great ways to package your press on nails to sell. This post is about how to package press on nails.
What you will need:
- Jewelry Boxes
- Mounting Tape
- Instruction Card
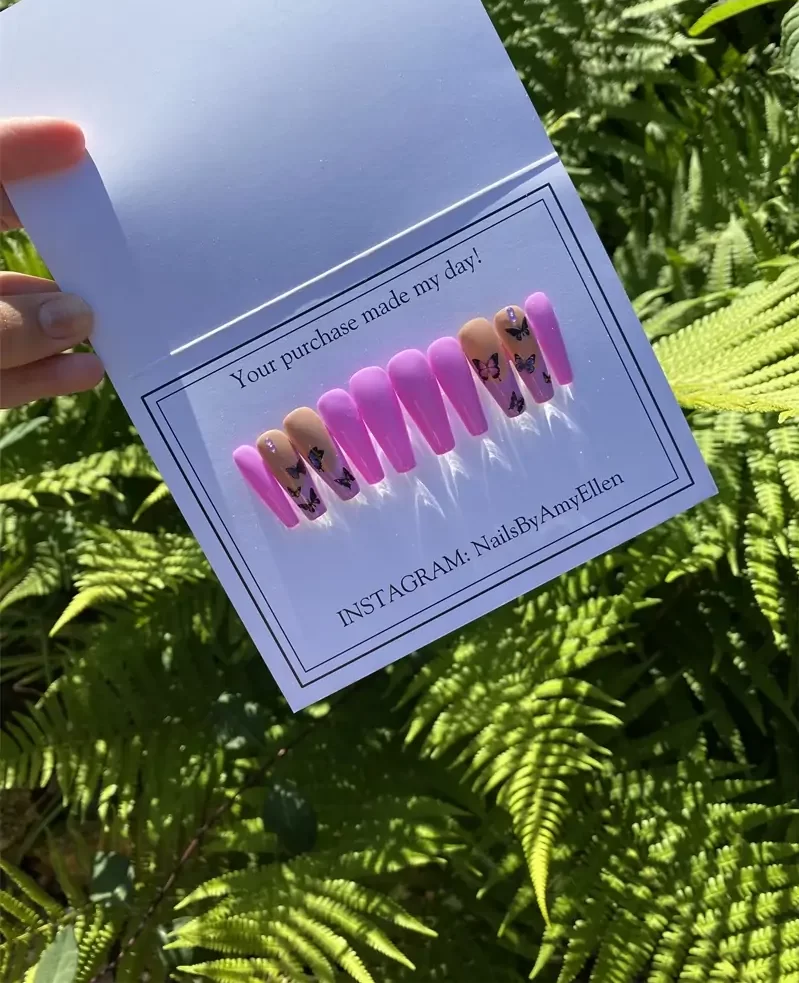
- Business Card
- Mini File/Mini Buffer
- Mini Cuticle Stick
- Mini Nail Glue
- Bubble Mailer
Now that you’ve made your press on nails, you’ll will want to package them up nicely to sell.
Packaging your press on nails is one of the best ways to showcase your brand. It gives the customer an insight into your brands look and feel before even using the product.
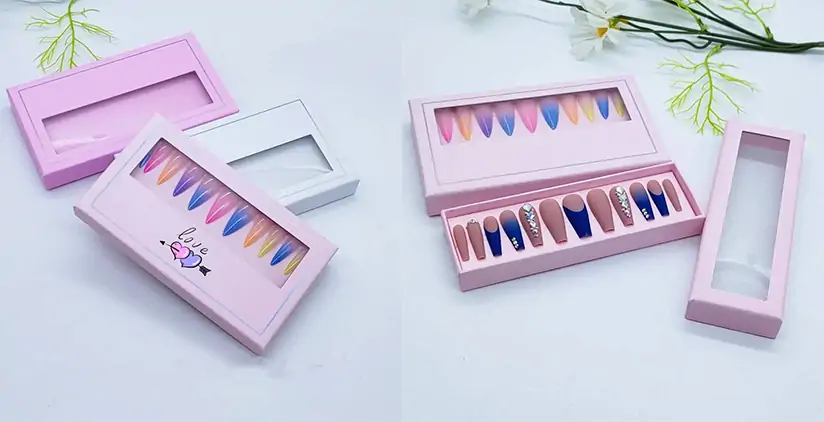
Luck Packaging offer various package press on nail sets,like white jewelry boxes with lids, boxes with window. You can decide what looks best to you and the image you want for your brand. You can choose different options of packaging, CLICK HERE !


Displaying your nails
Taking jewelry box and cutting about a 5 inch piece of mounting tape and placing it in the box. You’ll get used to determining the size of mounting tape to you based on things like the size of the nails and the size of the box you choose. The mounting tap is double sided so you’ll stick one side to the box, then remove the red strip and stick the nails on top. This will allow the nails to stay in place, until the customer is ready to remove them. Once you have a good amount of tape centered in the box, then place the nails in order from thumb to pinky, inside the box (see below).


Prep Kit
Let’s put together our prep kit. The prep kit includes the free with purchase items that your customer can use to help them get started with applying the nails.
The prep kit should consist of some variation of mini file, cuticle pusher, and mini glue. I also, include our business card, thank you card CLICK HERE inside every prep kit. Other things you could include are nail sticky tabs and a mini buffer. You can try to include some or all of these things depending on your budget, but I’m sure your customer will appreciate any help you can provide them in successfully being able to apply your press on nails.
Bubble mailers
Now you’re ready to get everything inside your bubble mailers to go out for shipping. Bubble mailers CLICK HERE are just the packaging envelopes that includes bubble wrap within the packaging, to keep your contents extra secure from being damaged during delivery. You will want to decide your bubble mailer size, based on the size of the boxes or packaging you chose for your nails, keeping in mind everything else you plan to include in the order.Make sure to include your instructions and customer receipt, also place your shipping label on the package, everything is ready to go out for delivery.